Translate

Showing posts with label project. Show all posts

Sunday, August 25, 2013

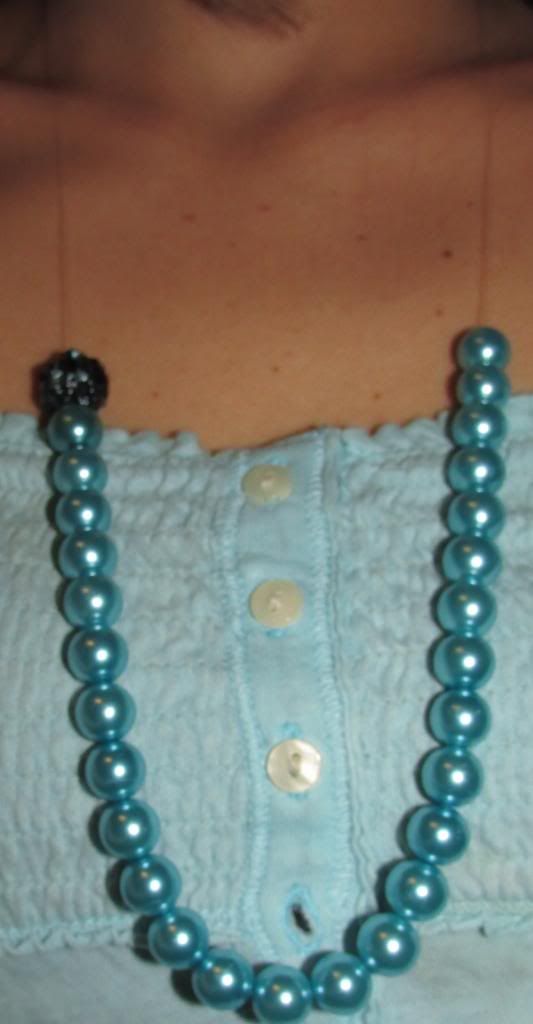
DIY Turquoise Pearl Necklace

As I've delved deeper into my experiences with crafting (jewelry, sewing, etc.) some of you expressed an interest in sharing tutorials of the projects I post photos of. Well, I've answered your prayers! I've really been working hard to deliver some brief tutorials on some of my most favored projects, so I hope you guys have as much fun with this new journey as I will. I also hope you'll share any of your tips or projects with me, too. Don't hesitate to message/comment for better detail/instruction. I always answer quickly. So, here I'm going to do a very brief show and tutorial of one of my favorite hand-made necklaces -- my turquoise pearls. This necklace is so easy that you guys probably don't even need directions, but I still have a few really helpful tips for you in the mix.


 Items used to make the Turquoise Pearl necklace:

- Fishing wire. I used probably 10" (just a guesstimate) for a long necklace, which I thought was so fitting for these beads. Use the length you desire.

*I've said this before, but can't say it enough: fishing wire is the cheapest, most reliable way to go if you're someone who beads a lot. It's sturdy, clear (in case the string shows or your beads are clear, there's no weird color sticking out taking the spotlight from your lovely beads). You can get a ton of fishing wire in the fishing dept. at Wal-Mart for like $3 whereas the craft section sells a very small amount of the clear stuff for far higher.

- 28 -ish Turquoise pearl beads. These are obviously not real pearls, but who cares when the color is this beautiful? These were actually my very first ever bead buy! My lovie and I stopped in Hobby Lobby and by chance, they were having a close-out sale, so we racked the F up! I bought these first, went back the next day and got tons of others. Lucky for you, even if your local HL doesn't carry these, you can still find them. Try here.

 If you aren't as madly in love with this color as I am, a strand of regular pearls is just as classy and gorgeous, so feel free to tweak it.

- 2 Crimp beads I've said before, I got a cheap pack of like 30 crimp beads at Joann for around $2.
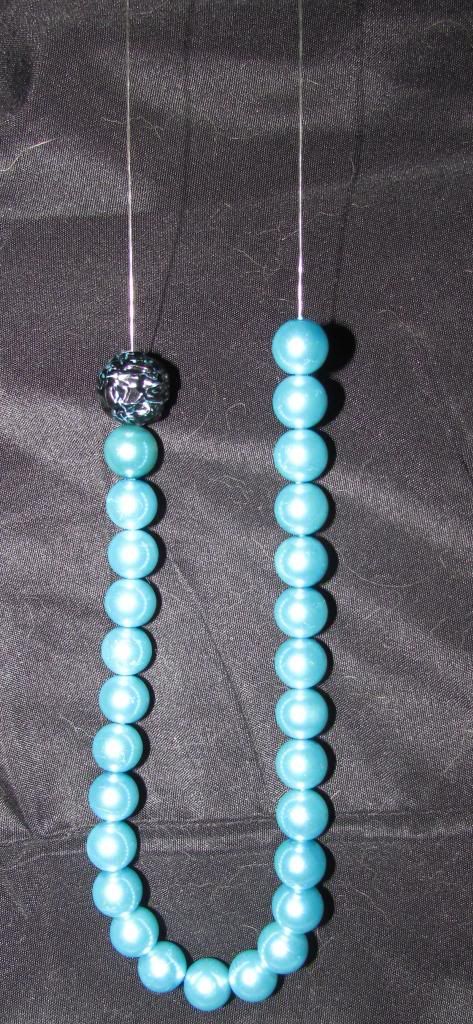
- One black or color of your choice bead. You may not be able to tell, but the one black, round, but crinkly shaped bead I used on only one side of this necklace has little bits of turquoise in it -- matching the pearls perfectly. I just liked giving the one side this bead because it makes it unique and just fun to me. You can skip it or do as you like. I got this bead in a pack of various shaped, lovely turquoise-colored beads from Joann. It was one of the little clear plastic packs with an assortment of very eye-catching beads. Trying to explain here... Seems like the brand was "Bobbi Brown" or something.

- Clasp is optional if your necklace will be as long as mine. It fits over my head without the clasp, so I never even use the clasp I wasted on this necklace.


                 Instructions (if you need em')

I realize this is a very easy beading project, so most people won't need a tutorial. I'll be brief, just in case you guys want to know how to construct this baby.

1. Cut your fishing wire to desired length. As I said, mine was probably around 10". Long enough to slip over my neck and hang at my chest.

2. Start stringin' on the beads. 

Tip: I use one of those clips... I call them "purse clips" as I don't know the actual name for em', but there found in most any store, especially Staples, if that helps you understand what type of clamp I'm talking about. To hold the end of my strand so I don't have to knot it immediately. I just loop it under the clamp real good.

3. Add crimp beads to each end of string.

4. Add an O-ring to each end of string, allowing a good inch for knotting and tucking into crimp bead. 

5. Knot string around O-rings. Fishing wire doesn't hold knots well, so do a couple of tight ones or use the fisherman's knot. Your crimp bead will secure the knot, so it's no big deal if it isn't perfect.

6. Slide crimp beads up and squeeze em' down over (or right under) the knot. 

7. Open one of the O-rings and attach the other O-ring into it, if this makes sense. Diagram below may be more helpful. It shows one "ring" opened and the other ring being slipped into it. Forgive me. I'm no artist. 


Then using pliers, adjust the opened ring back into place so they're securely held together. This will hold the necklace together.


** If you want to use a clasp, just do that and clasp it rather than attaching the O-rings to each other. If I'm confusing you, let me know & I will clarify.


Well, folks, that's all. If you need extra help, have a suggestion, tip or want to ask me about doing a tutorial on something in particular, do get in touch!

Much love,
Kendra

Monday, August 6, 2012

My Pearl Of The Day -- fun water beads!

Gallon of water & the tiny beads -- the supplies in green basket are NOT needed. They just happened to be on my desk during the process.


WHAT ARE WATER BEADS USED FOR?
  Thanks to Crystal Water Beads for including so much wonderful information, I can answer that question for you. It's always interesting to me to learn about a companies product, especially when the product is as cool as the water beads! 


This is a photo of the bottom of the water jug immediately after putting in the beads! How awesome does that look?

  The Water Beads were originally invented for farmers -- to keep moisture from evaporating from the soil so quickly. 


  Water Beads are super tiny when they haven't been submersed in water. When they arrive, they're about the size of a pin-head. Very small! Ok, about the size of a flea too, a small flea.  Once they've been soaked in the water, they absorb it and plump up.  These guys, as you see the difference in size in my photos, hold a lot of water! They start out tiny and then suddenly you look in the container and you have plump, beautiful beads! 

  Then the Crystal Water Beads can be poured into your plants soil and there they will slowly release their water, doing so without the water getting evaporated into the air! That's what makes these cuties ideal for plants. I have 3 aloe plants, as ya'll know, I eat them, so it's important to keep those guys healthy. Aloe needs very little water and the Crystal Water Beads are absolutely perfect for watering just enough, without overdoing it. Plus they really add some style to my plants. 

  And who doesn't want to show off their beautiful water beads? Well, I certainly do, so I've managed to dig up a pretty clear jar to show them off, for decorative purposes! Going to the Crystal Water Beads store site will give you many gorgeous ideas on ways to use and show off your fabulous Crystal Water Beads. 

  The only problem is, now I'm wanting to fill all kinds of vases full of the gorgeous little guys and display them in every single room, on every single table top and dresser we have! They're just so pretty I can't resist.

  Another wonderful thing about these beads -- you can choose so many different lovely colors, so you're color options and decorative personality never gets old. You can mix pink with black, purple with pink like I did and change them to match the room colors/theme or to even add some fun, unique touch to a boring room. They look pretty in flower vases or just sitting alone in a clear glass vase/bottle. Since they're so pretty, they don't necessarily need anything extra. Just a jar of the beauties is enough to add personality and a unique touch.


INSTRUCTIONS:

This is the best part about the water beads -- it's easy, quick and makes no mess. This makes it a perfect little project to include kids on. They'll enjoy watching the water beads "grow." Ours love, love, love the water beads!  Oh yea, the instructions.

*Add contents of package to 5 cups of room temperature purified water -- Not filtered or spring -- per 5 grams of beads.

*Allow the beads to stand in the water for 5-7 hours.  For the Marble Beads, allow 6-8 hours and for the Square Beads, allow 8-10 hours. You'll see a photos of the round regular Water Beads and the Square ones here. Those are the type I chose, but I think we'll end up ordering the others here very soon. I will update and show photos of those when we order.

*After the recommended amount of time has passed, drain the water and use as desired! 

 Why must it be purified water only?
  Using any other water could result in the bead not plumping. In other words, your beads may not "grow" if you don't use the recommended purified water.

OH NO! I don't know what purified water is or where to find it.
 It's OK. I promise. You can find purified water at about any grocery store and possibly even convenient stores, but don't hold me to that last one. If you've ever bottle-fed a baby or bought a new fish tank, chances are, you have purchased purified water from a store. You can usually find it in the diaper section. Or at least that's where it's at in my local Ingles. Just look for the gallon clear jug of water that will say "purified water" on the front. 

STORING AND CARING FOR YOUR LOVELY WATER BEADS
    Crystal Water Beads.com says:
To store the beads, remove them from water. Accelerate dehydration by spreading them out on a dry towel in the open air and out of a humid environment.  Once they are fully dehydrated and close to their original size, seal them in a air tight container such as Tupperware or Zip Lock.  

For extended life, keep them out of direct sunlight and away from temperatures above 85 degrees F while storing. "

The Water Beads come packaged in a little sealed plastic baggy. Well, the samples do. I don't know about a full size. I believe the large, full sizes come in a large plastic bag. Included is a little paper with instructions and this:

  "CAUTION:
  • Do not take internally.  Keep out of reach of children and pets.  Although this product is non-toxic, it may present a choking hazard for children.
  • Do not flush down drains.
  • For decorative use only."
  •  


  Crystal Water Beads store also has an amazing project going on called the Beads Grow Seeds Project! It's so awesome. Here's an excerpt about the project straight from their webpage: 

  "The Beads Grow Seeds Projects is focused on providing Super Absorbent Polymer for Village farmers to use in the soil for a better success rate in their crops. 

When a customer buys our product or makes a donation, we use these funds to purchase Super Absorbent Polymer. We will take this product to the troubled soil area's around the world and work with the locals to install the product.
When added to the soil, plant roots grow around and through the swollen polymer, where they are able to extract the stored water and nutrients. The controlled release of water and nutrients aids plants in achieving optimal moisture conditions for maximum plant growth.
With severe droughts occurring on a more frequent basis due to global warming, water absorbing polymers will help food sources survive by reducing irrigation requirements up to 50%. This product will continue to work in the soil for up to 8 years.


*Clicking the link there will take you to their Beads Grow Seeds page, so that you can go see for yourself. 

The prices at Crystal Water Beads Store are so perfectly affordable that you can order beads for every event, every plant, or as I think I'll end up doing, for every single room in your house! They're amazing! As soon as we were pouring our beads into the water, my lovie said "how much are these things? I want more!"  Looks like I'm not the only fan. Who can blame us? They're so fun!

Wednesday, December 14, 2011

DIY Body Oil from Save On Scents


     I've been mixing and sniffing for weeks! The photos show everything that comes with the DIY Body Oil kit from Save On Scents.  Right hand corner is a bag of the 1/3 oz glass roll on bottles.  Above that is just a stack of tissues for clean up. The bottles in the middle are the scents I chose: Heat by Beyonce, Juicy Couture, Miss Dior, Jadore, DKNY Be Delicious and Channel. Each of them smell identical to the actual designer product. At the left hand you see 2 tiny bottles with a blue label and one with a red label. Those are dyes for coloring your perfume oils! At the very top from left: pack of gloves . Below the gloves is a plastic baggy of 6 glass droppers. Then roll on balls, right below the pack of roll on balls is a pack of 10 scent strips. The large bottle you see is one pound of Di-propylene Glycol (DPG).  Labels to stick on your bottles are included too!

The DIY Body Oil kit comes with everything listed above plus instructions. Save On Scents does an amazing job at including everything you will need to make your own scents. You don't have to worry about running out to get more supplies. Everything is right there. The instructions are easy to understand. With Save On Scents doing the work for you, this leaves you to have all the fun. 


When ordering the DIY Body Oil kit, you can choose 6 scents for your kit. I chose the ones listed above. Save On Scents has just about every scent you can imagine to choose from.  Each kit makes 48 roll ons. 


The DIY Perfume Body Oil kit is great for those who are just starting out and even for a project to involve your kids in. 


A close up of some of the included items in the kit.


      I am still experimenting with different fragrances, but have made one kick-a** perfume that I've been wearing daily for a few weeks! I've had several compliments on it too. Maybe I am a natural, what do ya think? I wish! Mixing, sniffing and getting it right is a lot of fun. 


  Above is 2 of the scents I chose with the roll on bottle in between them and a scent strip at the side. These were the beginning stages of the makings of my fragrance. I even named it! 


  You will need no extra items besides what is included in the kit unless you want to purchase extra scents and such. In the photo, I had already done the experimenting to find exactly what I wanted and as you can see, I had already started adding my mix to the bottle.


  To start you should read the instructions included! They are short and simple. It does state to be careful with certain table tops and plastics. Your work space should not be of certain finishes. I chose to do it on my dresser with a large mirror laid down. I did end up getting the perfume oil on my dresser, but it didn't damage it. It will eat through some plastic so do take carefully read instructions.


  Above is a picture of me mixing my scents! You will use the glass eye droppers included in the kit to drop the scent on the scent strips and into the roll on bottle. I took a scent strip and added a drop of my first fragrance then a drop of my second and sniffed. Then I decided to experiment by adding another, rather risky fragrance onto the strip. It was mixing nicely together so I kept experimenting this way until I found the right amount of each of the 3 fragrances and decided it was perfect. This is why the genuis folks at Save On Scents even add strips to your kit, because mixing fragrances in a bottle will waste a lot! 


  As I dropped my fragrances on the strip, I wrote down how many drops I was using this way when I created the bottle of fragrance, I would know how much to add. This was a genuis tip from Save On Scents. Otherwise, I would've dropped away and then felt real stupid when I decided it was time to mix the fragrance in the bottle! 


Writing down the amount of drops needed.  


  Save On Scents includes 6 glass eye droppers this way you don't have to "double dip" causing other scents to mix with each other in their storage bottles. Use one dropper for each bottle (like shown above). To keep the scents from mixing. 


  After you have created a scent strip that you are happy with and written down your "formula", you can begin dropping into the roll on bottles. 


  In my case, I added only 2 drops of fragrance X for the entire roll on bottle and 40 drops of Y to the entire bottle and 40 drops of Z to the entire bottle. 


 Usually adding the fragrances half way is enough to get a strong Perfume Oil. You can add a bit more or less to your liking though. I didn't need to fill it half way to get a good strong scent though. 

While you are adding your fragraces to the roll on bottle, sniff every few seconds to be sure it's going as expected. You may see that you need a little extra of this or a little less of that. It's all about experimenting. Just be sure to write down any changes. 
While mixing mine, I decided to add several more drops than I had expected. It was easy with no extra hassle. 


  After you have filled your bottle to the desired level (I wouldn't suggest any more than a bit over halfway since it may be overpowering. Unless you're sure you want that strong of a scent!) You will fill the rest of the bottle with the DPG. This is a quick and easy step. You the dropper to avoid spills and waste. 


Next you will add the roll on ball by simply pushing it into the top. It takes only a second and is easy to do. Now, shake your perfume!


You can add red or blue dye. I planned to make mine pink by adding a bit of red, but I got dye happy and what do ya know? It turned out red! Lol. That's no problem though since I intend to keep the first bottle and the others I make with this fragrance for gifts can be dyed to make it pink.

Use one of the included sticky labels and write your fragrance on it and stick it on the bottle.


  My partner was along for the perfume making ride and we both had a ton of fun! He gave me the idea of mixing the blue and red to make a lovely purple. I haven't done that yet since I will need him to mix it right (remember, I get dye-happy? Lol). Major kudos to Save On Scents for thinking of EVERYTHING when it comes to their kits. Dying the perfumes add so much extra beauty and fun to the project. 


Me adding the DPG to my bottle. (Ignore the crazy fingernails. I was testing polish colors! Lol)     


After you have mixed into the roller bottle, added the dye if you choose and popped the ball into place, you're ready to use!


Save On Scents
 Now that you've seen me in the process and read the instructions, I thought I'd share my thoughts/opinions about Save On Scents.

 This DIY Perfume Oil Kit was absolutely perfect for my needs. I just wanted to experiment with different scents and have fun while including my partner. We had a great time and plan to continue creating scents. I also plan to stick with Save On Scents for my perfume making needs. I love how you simply order the kit without having to shop for each item specifically (which would just confuse me and stop me from even bothering). You have hundreds, if not thousands of designer scented fragrances to choose from as well as other non-designer fragrances. The kit allows 6 different scents and it comes with plenty of everything you need to experiment or make the perfumes for gifts, etc. You have a lot of room to really find what it is you're looking to create.


  I've already been debating on what other scents I want to order. They have such a wide variety and you can order the roll on bottles and all products as needed for a great price! We plan to include our 12 year old in this little project as well. 


  You can choose to purchase the DIY kits or any of the products as needed, like I said. Save On Scents also offer Bath and Body supplies and DIY kits for that as well as Home Fragrancing supplies and kits! They also offer other supplies such as scented incense.


Quality
You can see that the items included in the kit are of good quality. You have the bottles for keeping the fragrances in with labels on them. You have the glass eye droppers which can be re-used after cleaning well, etc. Everything is great quality. As for the actual perfume, I am so impressed! 

The fragrances smell amazing and identical to the designer brands. I've used the knock-off stuff that smells good, but I end up never wearing it after a few uses. It starts stinking after a while. When I first rolled some of my created fragrance on, I worried it would start stinking. Every time I would (and still) move around and catch a sniff of it, I'll smell my wrist. I just love it! 

I've been wearing my created fragrance for a few weeks now and it's still smelling awesome. I'm positive that I will continue to like it and continue to buy the products from Save On Scents to continue creating this. 

It smells wonderful on my skin as well as the other females in my family. I've been carrying my roll on in my purse to let people sniff and try. I've gotten amazing responses! My mom, perfume is her enemy. It doesn't matter if it's made of diamonds she hates it. She wears one brand of body mist every once and a while and that's all. I can spray one spritz of something and if she smells it, she has sinus problems. I knew she was the first person to ask her opinion on the scent since she's so critical about most. She said "Oh wow! That smells good and stuck it to her nose for a second whiff!" I couldn't believe it! I said "now I know it's good!" 

I've been timing the length it stays on every time I wear it. I can rub a streak up my wrist and a few small dabs on my neck and the scent will be there for 4-8 hours. Since I use very little, I need to reapply after about 5 hours so others are able to smell it. Save On Scents' fragrances smell great. They don't have that cheap, alchol smell. They smell... luxurious. That's the word to describe the scents. 

The dry down was unlike the cheap knock-offs. It actually smells just like it does in the bottle on my skin! After about 6 hours, I notice it mixing with my skin and smelling slightly sweeter. It still never changes. All perfumes tend to have a sweeter dry down on me. I love it. 

I was surprised that I actually found the mixed perfume to measure up to my all time favorite, Nollie. I've been using that stuff religiously for years and thought nothing would measure up! 

Overall, I'm totally impressed, exciting and loving Save On Scents. I'm excited to try new fragrances! I give the company a 100/100! No complaints here.