Translate

Showing posts with label crafts. Show all posts

Sunday, August 25, 2013

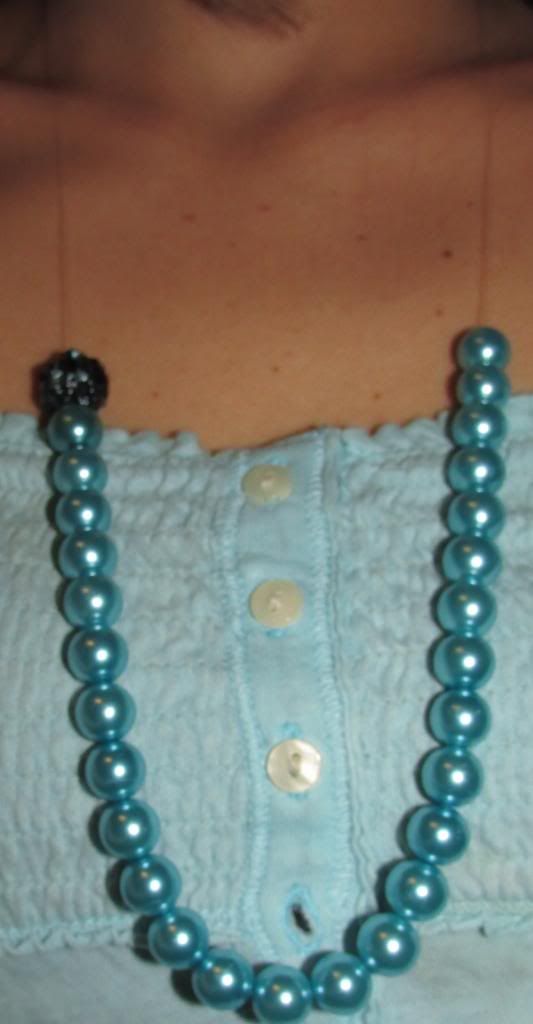
DIY Turquoise Pearl Necklace

As I've delved deeper into my experiences with crafting (jewelry, sewing, etc.) some of you expressed an interest in sharing tutorials of the projects I post photos of. Well, I've answered your prayers! I've really been working hard to deliver some brief tutorials on some of my most favored projects, so I hope you guys have as much fun with this new journey as I will. I also hope you'll share any of your tips or projects with me, too. Don't hesitate to message/comment for better detail/instruction. I always answer quickly. So, here I'm going to do a very brief show and tutorial of one of my favorite hand-made necklaces -- my turquoise pearls. This necklace is so easy that you guys probably don't even need directions, but I still have a few really helpful tips for you in the mix.


 Items used to make the Turquoise Pearl necklace:

- Fishing wire. I used probably 10" (just a guesstimate) for a long necklace, which I thought was so fitting for these beads. Use the length you desire.

*I've said this before, but can't say it enough: fishing wire is the cheapest, most reliable way to go if you're someone who beads a lot. It's sturdy, clear (in case the string shows or your beads are clear, there's no weird color sticking out taking the spotlight from your lovely beads). You can get a ton of fishing wire in the fishing dept. at Wal-Mart for like $3 whereas the craft section sells a very small amount of the clear stuff for far higher.

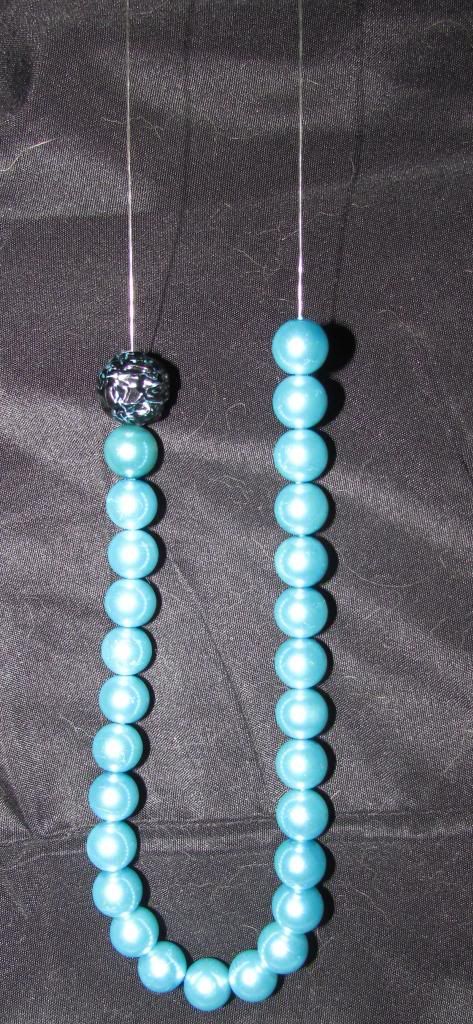
- 28 -ish Turquoise pearl beads. These are obviously not real pearls, but who cares when the color is this beautiful? These were actually my very first ever bead buy! My lovie and I stopped in Hobby Lobby and by chance, they were having a close-out sale, so we racked the F up! I bought these first, went back the next day and got tons of others. Lucky for you, even if your local HL doesn't carry these, you can still find them. Try here.

 If you aren't as madly in love with this color as I am, a strand of regular pearls is just as classy and gorgeous, so feel free to tweak it.

- 2 Crimp beads I've said before, I got a cheap pack of like 30 crimp beads at Joann for around $2.

- One black or color of your choice bead. You may not be able to tell, but the one black, round, but crinkly shaped bead I used on only one side of this necklace has little bits of turquoise in it -- matching the pearls perfectly. I just liked giving the one side this bead because it makes it unique and just fun to me. You can skip it or do as you like. I got this bead in a pack of various shaped, lovely turquoise-colored beads from Joann. It was one of the little clear plastic packs with an assortment of very eye-catching beads. Trying to explain here... Seems like the brand was "Bobbi Brown" or something.

- Clasp is optional if your necklace will be as long as mine. It fits over my head without the clasp, so I never even use the clasp I wasted on this necklace.


                 Instructions (if you need em')

I realize this is a very easy beading project, so most people won't need a tutorial. I'll be brief, just in case you guys want to know how to construct this baby.

1. Cut your fishing wire to desired length. As I said, mine was probably around 10". Long enough to slip over my neck and hang at my chest.

2. Start stringin' on the beads. 

Tip: I use one of those clips... I call them "purse clips" as I don't know the actual name for em', but there found in most any store, especially Staples, if that helps you understand what type of clamp I'm talking about. To hold the end of my strand so I don't have to knot it immediately. I just loop it under the clamp real good.

3. Add crimp beads to each end of string.

4. Add an O-ring to each end of string, allowing a good inch for knotting and tucking into crimp bead. 

5. Knot string around O-rings. Fishing wire doesn't hold knots well, so do a couple of tight ones or use the fisherman's knot. Your crimp bead will secure the knot, so it's no big deal if it isn't perfect.

6. Slide crimp beads up and squeeze em' down over (or right under) the knot. 

7. Open one of the O-rings and attach the other O-ring into it, if this makes sense. Diagram below may be more helpful. It shows one "ring" opened and the other ring being slipped into it. Forgive me. I'm no artist. 


Then using pliers, adjust the opened ring back into place so they're securely held together. This will hold the necklace together.


** If you want to use a clasp, just do that and clasp it rather than attaching the O-rings to each other. If I'm confusing you, let me know & I will clarify.


Well, folks, that's all. If you need extra help, have a suggestion, tip or want to ask me about doing a tutorial on something in particular, do get in touch!

Much love,
Kendra

Tuesday, August 20, 2013

DIY Jewelry

                 My Hand-Made Jewelry Collection:

 **I try to leave a brief "tutorial" on each piece I make, so if ya'll ever need help or have questions or want to request a specific tutorial, don't hesitate to message me. It'd be my pleasure! Follow me on Pinterest for quicker updates, babes!

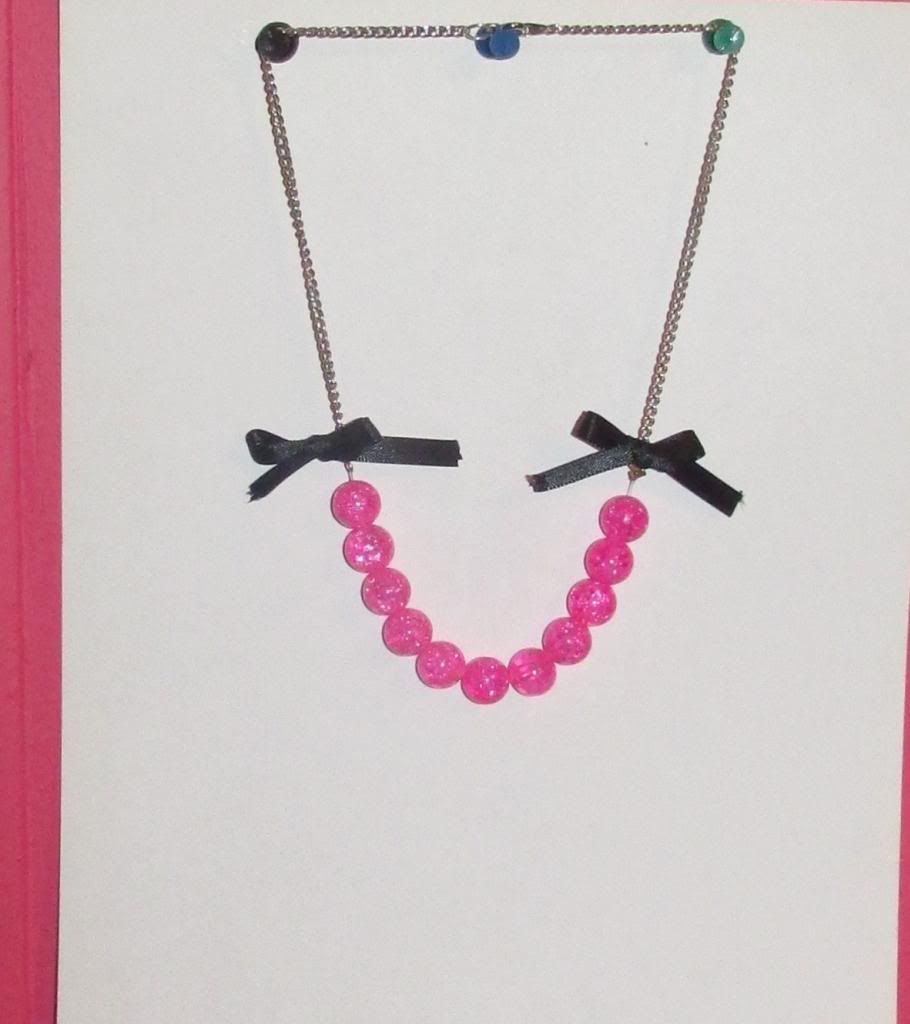
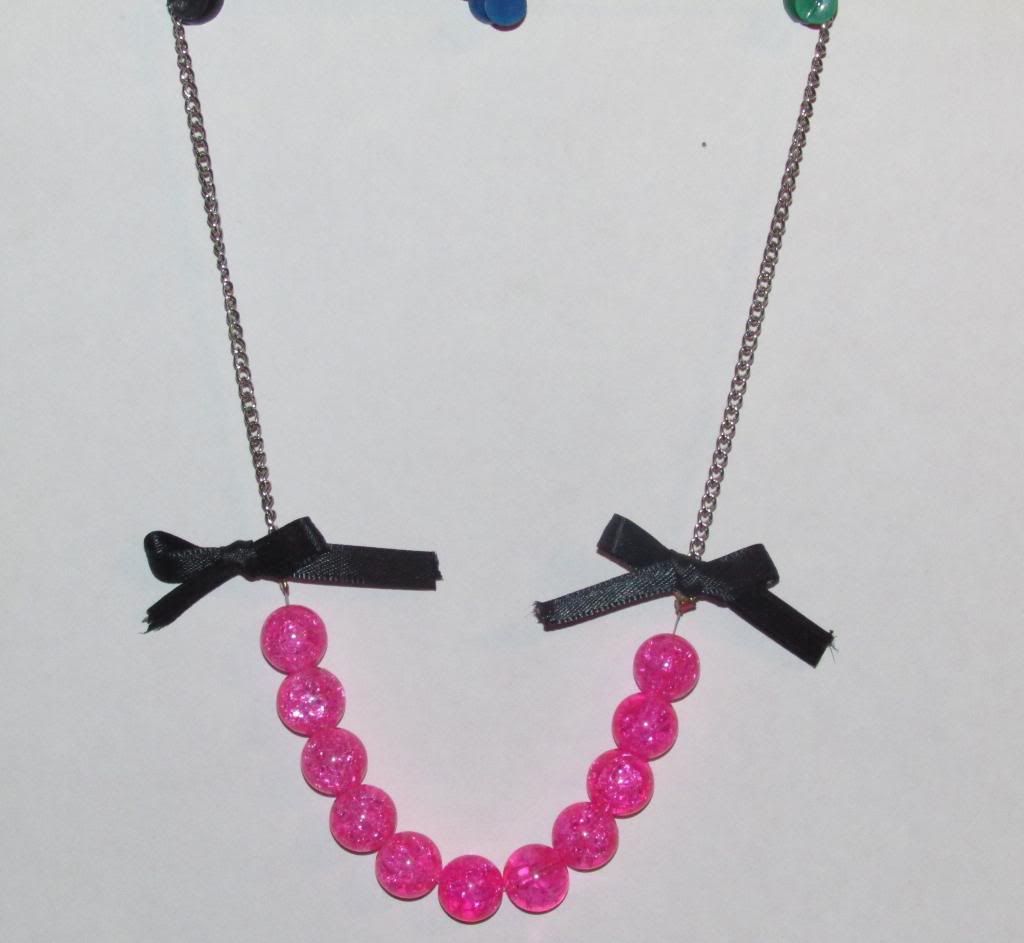
             The above necklace was made using:
- Chain I had in my chain slot of my bead stash. Not sure where it's from or anything. I just add all my chains to a slot and use as needed.

- Black ribbon.

-Clasps, although if you make the length long enough to fit over your head, you won't necessarily need a clasp.

- 11-12 leftover hot pink, crackle glass beads from a strand I bought from Wal-Mart. Pretty sure it came with two strands.

-2 Crimp beads. I bought a pack of mine from Joann because that's where I found them cheapest (around $2, I think.)

-2 O-rings. Also got a pack from Joann for very cheap (a bit over $1, I think.)


- Fishing wire. You can find a whole roll (which is enough fishing wire to last you for at least an entire year's long of jewelry makin'!) for around $3! This is my favorite kind of string to work with jewelry-wise because it's so sturdy, clear so if your string will be showing or your beads are clear, the string doesn't stand out. Also because it's much cheaper than if you bought the clear string like this in the craft department, although it looks to be fishing wire, they still price it higher for a far smaller amount in the craft dept. But moving on...


                       Detailed Instructions
You can probably look at this and tell exactly how to make your own, but just in case I'll brief you:

1. Get desired amount of chain. I measure this out by taking the chain and wrapping it around the back of my neck and cutting it to where it'll meet right under my collar bones. I cut the chain this length, but you can cut as long/short as you wish. I like it this way because only some of the chain shows and the middle area is all pink, medium-sized bauble-y beads!

2. String the beads onto fishing wire (desired length) and at each end of the string, add a crimp bead.

3. Add an O-ring on the end of each chain piece -- right above the black bows. Tie the string on the O-rings (both sides) and do so tightly as possible. Fishing wire ties come loose if you aren't careful. I like to use two pliers -- one in each hand -- to grasp the end of the string and above the knot and pull tightly. This does the trick. Don't fret if your knots aren't as sturdy as you'd like because the crimp beads will provide extra protection.

4. Now, slide your crimp beads to the end, right on top of your fishing wire knots and use pliers to squeeze em' shut!

5. I made my own little bows from black ribbon to add some spunk to this necklace. If you'd like to do so, cut the ribbon to desired length. I probably used nearly 2" per bow. Cut two pieces if you want two bows, like mine. I tied my bows straight to the O-rings, so they don't flop around or turn around.

Make the bows. Use a stitch, super glue or finger nail glue (or something else) to hold the bow together. A good method is using a threaded needle through the middle of the bow, going all the way through to the back and knotting. For this necklace, I used a dab of glue and tipped the bows' ends with clear nail polish so they don't unravel or fray.

P.S. My bows took some work because the last one didn't match the first. Since I'm sloppy and didn't care to make it 100% perfect, once I got them even enough to please me, I was done. However, if you're a perfectionist and get frustrated with the two bows, this tutorial (making bows perfectly using a fork) might help. I don't know that it will as I've never tried this method, but definitely plan to because I'll eventually need to make perfect bows. I even pinned this tutorial on my Pinterest board, which you guys should so come follow! I post all the arts/crafts and stuff there to keep up with my projects and To-do's.


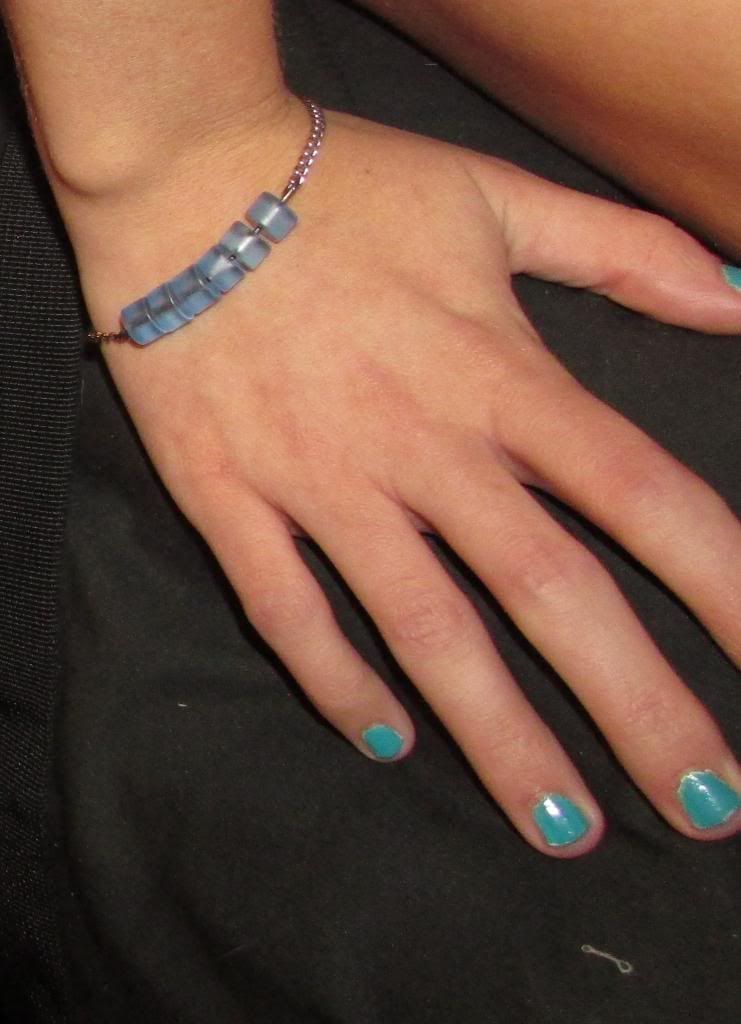
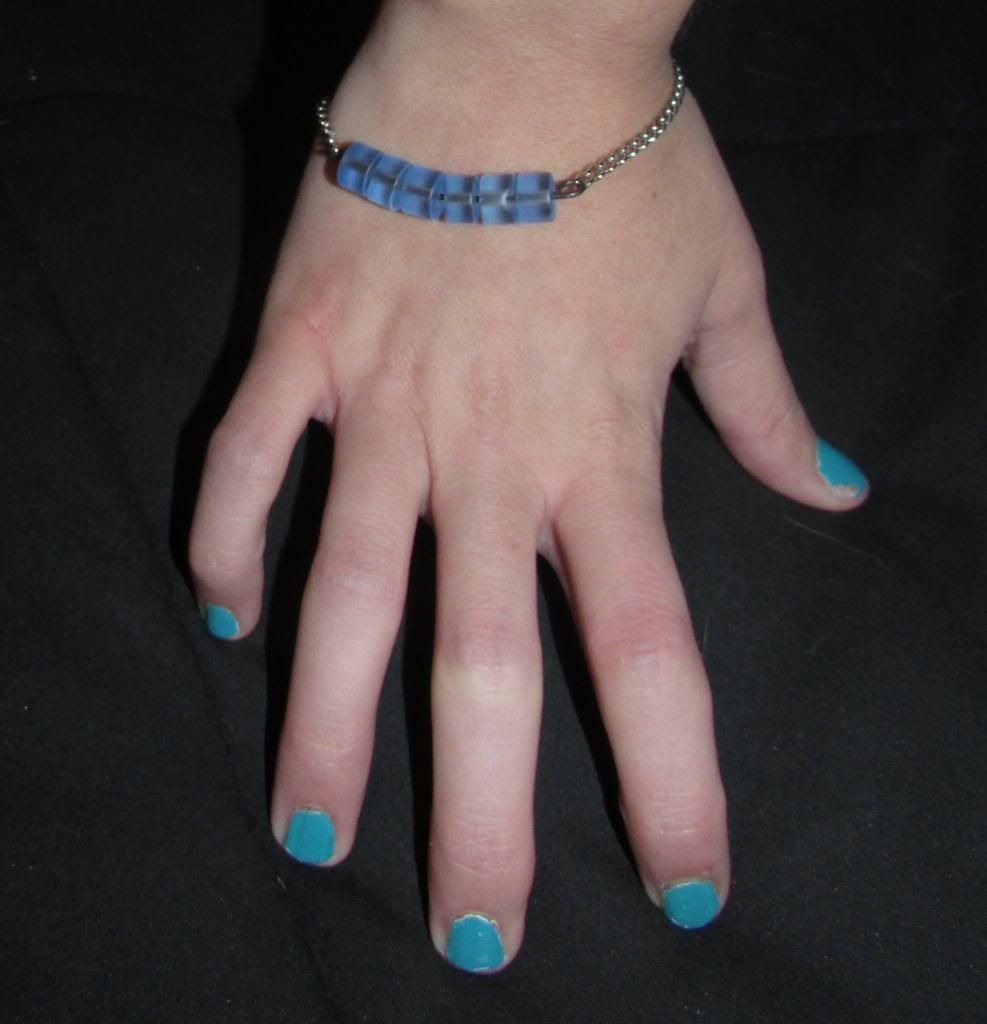
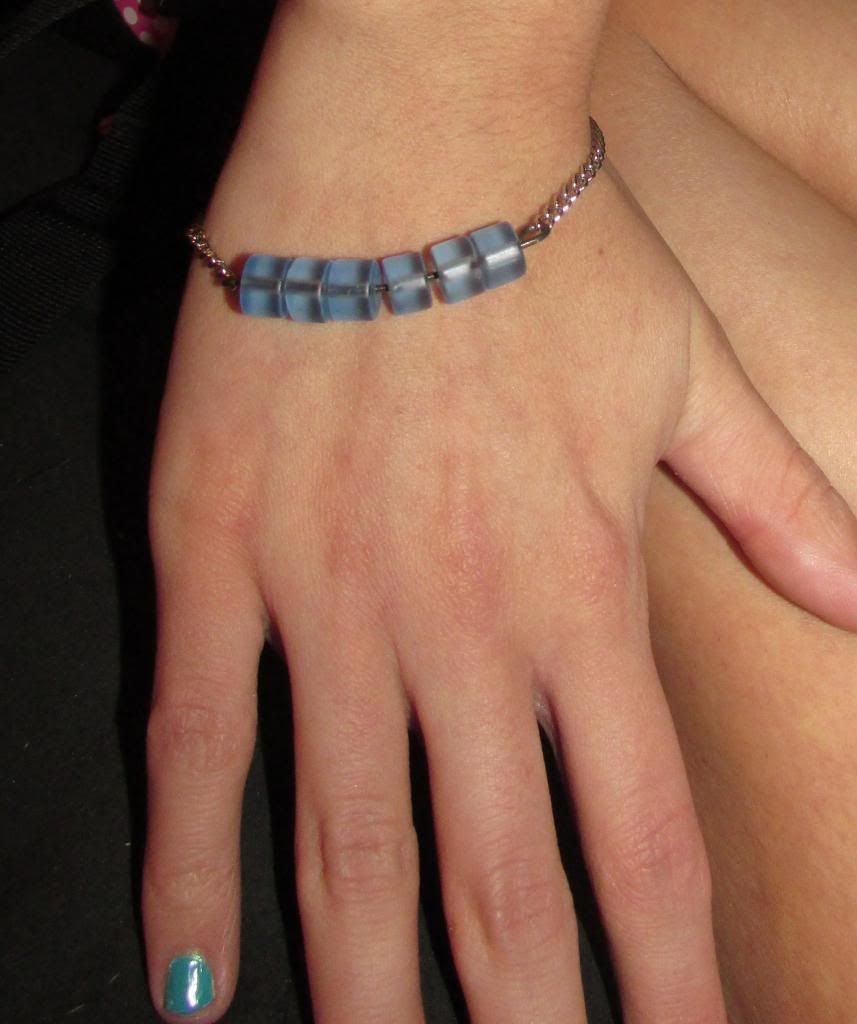
           Blue Statement Bracelet (Quick, Easy Project)


                  This bracelet was made using:

- 6 round, flat-sided glass blue beads. They're kind of a frosty color, if you can tell. I wish I could tell you guys where these exact ones came from, but I've not clue as my lovie surprised me with a pack of them. However, I found some similar ones here, which come in a more beautiful deep blue color. They also look like they come in a frosted clear and green too! Perhaps I'll have to put those on my to-buy list as well. I just love unordinarily shaped beads.

P.S. I had some very similar beads to this in a green color (tutorial and photos if you scroll down) that I used this same technique for a necklace. I got the green ones from a pack of $2 glass beads at Wal-Mart. A great deal. Came with enough beads for a long necklace. 

- About 2" of steal annealed wire, which I bought about 7 months ago on Amazon & it came lookin' like a Slinky. Remember those things? Anyways, I paid around $5 for it, but it has been totally worth it! It's sturdier than the earring wires used to make dangly earrings and items like this bracelet. Plus, I can do all sorts of fun wire-y stuff. Anyways, though. If you don't have wire, one of those earring making "sticks" will work.

- Leftover chain. Not sure what kind or where it came from. I just dump all my chains into a slot in my beading box. Just choose chain that you like and don't worry about the length being too long because you snip it to fit! P.S. I can tell you that if you don't mind the super high-quality stuff, you can buy very long packs of chain (of all colors!) at Joann or Wal-Mart for around $2 each. I bought like a 10 foot long black, matte chain from Joann for $1 and to put my super long owl charm on. The darn owl came on a necklace my lovie bought & surprised me with on our last Panama vacation. Paid $30 for it and the day he bought it, the chain broke! I did a quick fix for it, but it soon began turning to a bronze rather than silver and started smelling badly! Weird. So, that lead me to buying the black chain from Joann, which matched my owl's eyes wonderfully, gave it a "chic" look I guess you'd say and I had tons left over. That could be a pointless story I just told because I did not even use that leftover black chain in this project, but now you know where to buy chain for cheap. Moving on.

-You'll likely need a clasp. I use these cheap ones I bought (like 50 per pack) from Joann for around $2. It's what I use on almost all my projects requiring a clasp. P.S. If you like lobster clasps, Wal-Mart kid's craft section is where it's at, friend. I'm not even joking. They're thick, sturdy and amazing! I'll admit, these clasps from Joann (don't remember the brand, but it was the cheapest one) have had a few in the pack that were broken. So you'll see a pretty awesome sized pack of lobster clasps at Wal-Mart in the kid's craft section in a pink plastic, resealable bag. Don't know for sure the price -- I think less than $4-$5 -- but I tell you, those were some of the best clasps I've ever used. Okay, moving on. Again.

 P.S. If you have no clasps, but do have some wire -- you can create your own easy clasp! They're beautiful too. It may not match your chain though. There's a tutorial on how to make your own clasp here. I love those! What a beautiful job and they'd be a cheap, quick and easy way to do up a bracelet. Plus, those add a nice touch to a plain ol' clasp. There are loads of other DIY clasps, so do a search if you want more choices.


                         Brief instructions:

This bracelet probably speaks for itself in terms of how to construct it, but just in case...

You'll string your beads onto the wire, then cut it leaving about 1/2" inch room for making a loop at each end of the wire, each end of the beads.  

Get your chain ready, add clasps and O-rings as necessary. 

Fit the chain around your wrist and determine where it needs clipped, if any. Use the cutting tool on pliers to snip. You can secure the open links back together using your pliers.

Since bracelets that're roomy tend to slide to the underside of the wrist, you want to be wary of that when making this one since the strand of beads need to face the outer side of your hand. So, I had to cut my chain shorter than I would for a normal bracelet. 


Now, take the strand of beads on the wire. If you haven't made your loops at each end of the wire, do so now using your plier tool. You can open the loops on the ends of the wire to secure them to the end of the chain.


These instructions are not extremely in-depth. If you need deeper instructions, shoot me a message & I'll come to the rescue right away. If you don't want to do that, do some online searching to learn how to use jewelry pliers, if that's the part you need help on.


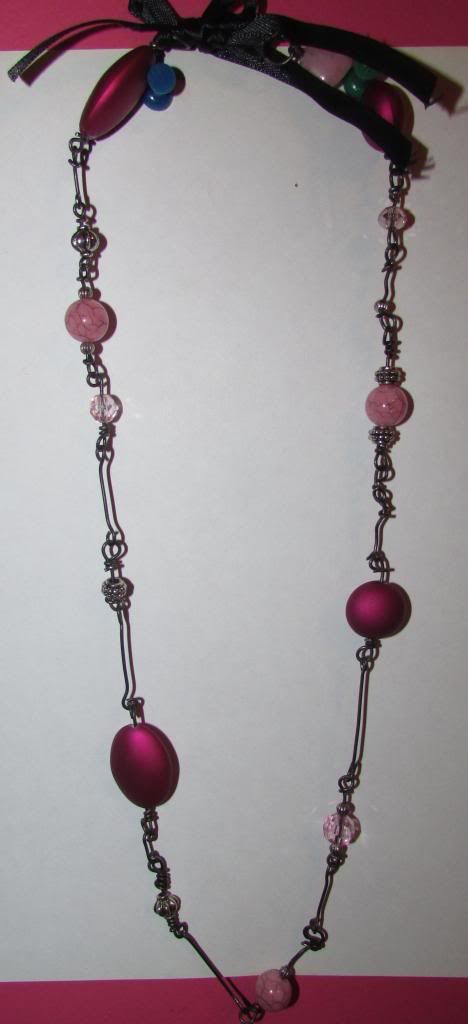
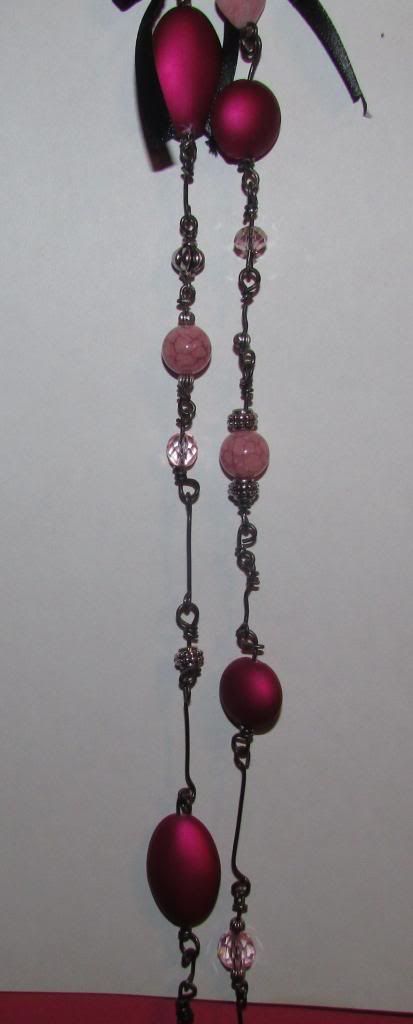
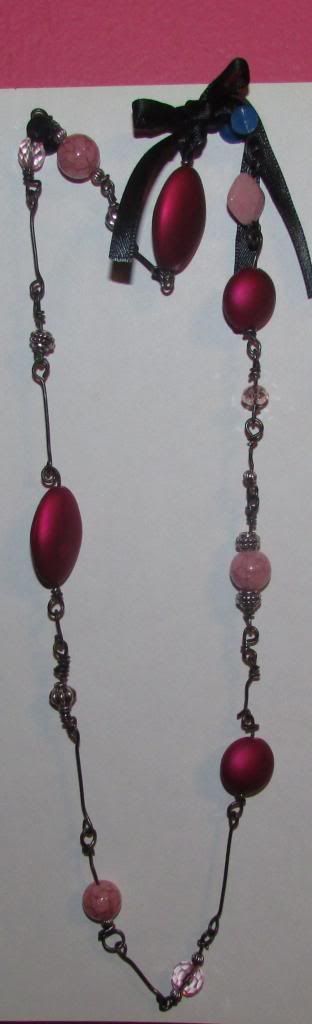
The necklace above was made using the following:

- One pack  of the large, shiny but matte pink round and oval-shaped beads (comes with 2 strands) from Wal-mart.

-Steel annealed wire -- I bought a nice amount of this stuff off Amazon for like $5, although the price was listed as a dollar! That aside, I'm so glad I did because this stuff has been a life saver. I've truly been able to expand the designs of my jewelry using this stuff! Totally worth it.


The chain thingy was made by me using cut pieces of the wire and using my plier tools to shape and cut. It looks a bit rough up-close, but I'm happy with it. You can always be more precise with your wire-shaping, though. The beads were all also attached using this wire. No extra stuff was needed besides beads, ribbon and wire. It's so long that it fits over my head without the need of a clasp. The way I see it, if you don't need a clasp, no sense in wasting one!


-The lighter pink colored beads as well as the clear-pink ones came in another $2 pack from Wal-Mart. I actually had these left over and even some left after making this necklace! The pack had a great supply of beads in it.


As for the ribbon, I basically just cut two pieces, folded each in half and tied them around each end of my wire loops (shaped using the tool and the wire.) Very easy project, but the wire twisting took some time and more patience than I had, which is why mine isn't so perfect looking.


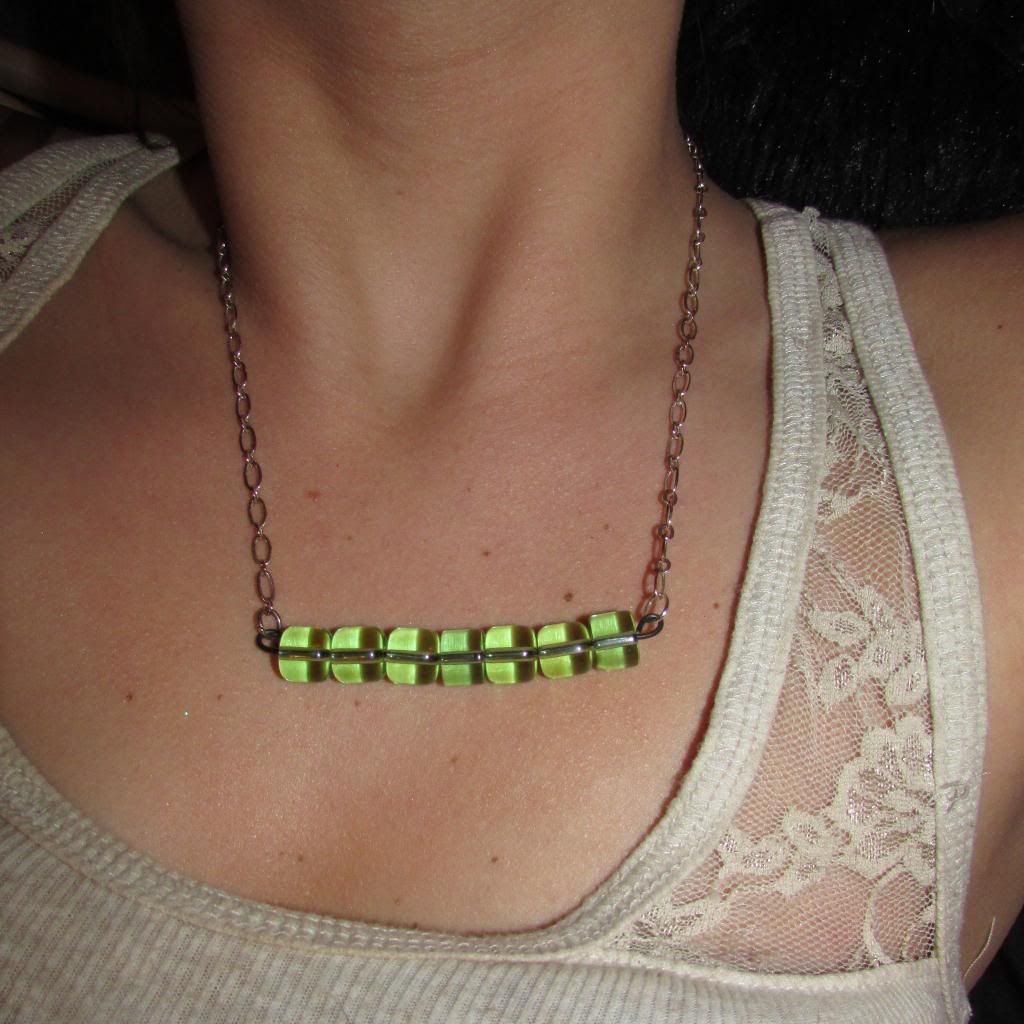
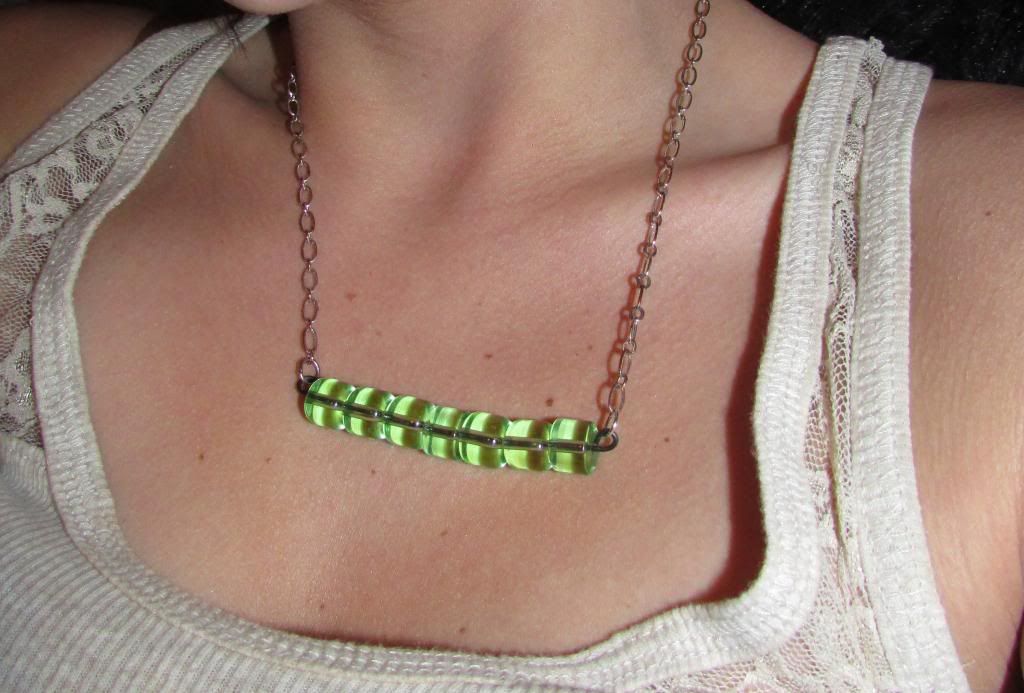
Necklace made using:


- Old chain in my chain slot of bead stash. 

- 7 Rounded, interesting shaped green glass beads found at Wal-Mart in the $2 bead station.

- About 1 1/2" -  2" of steel annealed wire. You can use an earring "stick" or other wire. I like this because of the sturdy-ness and ease-of-use, though. 

-And of course a clasp at the back, but if you make this necklace long enough to fit over your head, no clasp is really needed!


As you can see, this is a really easy, quick necklace to make & it looks nice and unique. Kind of a statement necklace. I had planned on using the other shapes in the pack (there were some teardrop shapes and smaller shapes like the ones in the photo.) I wanted to add them each on another stick of wire, one under the other, but once I got them all together, I just thought the simplicity of the one strand looked so much better for some reason. You could still do that though.

The blue glass bead bracelet I made previously is very similar to this. I basically used the same exact technique only a bracelet length instead of necklace.

Monday, June 18, 2012

Handmade Journal gifts! DIY

Front of Flamingo Journal with pocket                                                                               


Back of Flamingo Journal  


    As a writer, I'm always keeping my notebook in my purse in case I get an idea for a story. Yes, even when I'm going to the tanning bed, my notebook comes too. You'd be surprised at how a good 20 minutes in the tanning bed can refresh your mind and allow you the ideas to come. In fact, I take a trip to the tanning bed if I've had a bad case of writer's block. I guess it's like meditating for me, but this post isn't about my adventures in the tanning bed. It's about this kick-ass handmade journal I made!

  I wanted to pretty up my own notebook, but I get so sloppy in mine when I'm writing or putting down ideas that prettying it up would be useless. Our fabulous neighbors are an older couple who we've become close with over the past several years. We go through these spells where we give each other little gifts back and forth. These spells have been known to last an entire month long! 

  Last week we found a tee-tiny baby kitten dropped in our driveway. It was pitiful, barely able to make it on it's own and not even old enough to be away from it's mother. It had a nasty eye infection and I simply could not take care of the poor thing. We had all the kids that day and the kitten couldn't stay here with my other cats--they're not nice. 

  My Lovie had the idea to take it to our lovely neighbors. They are huge animal lovers like us. I had a poodle once and they loved him. I ended up giving him to them and they've taken wonderful care of him so I knew the baby kitty would be safe there. My Lovie went up there and asked if they would help out by taking the cat in until we could find a new home for it. They kindly obliged and have already fell in love! 

  No, this post is not about kind neighbors and cats. I'm gettin' there. Just hold your horses. Since they were so kind to have taken in the kitty, I wanted to thank them. Handmade is the most thoughtful, right?

MATERIALS I USED TO MAKE IT


- 2 pieces of sturdy cardboard. I cute mine from a cardboard box because it's very sturdy. You can use simple cereal boxes, but that was too flimsy for my taste. Make the rectangles, or squares of cardboard as large as you want. I cut mine from the flaps of the cardboard box and then cut them slightly smaller.

- Scissors.

- Fabric scraps. I'm big on saving everything, not wasting so I happen to have a lot of small, fun printed fabric scraps. You can always go out and buy fabric, but the thing I love most about this project is being able to use up what I have leftover and just sitting in a box ready to be turned into something. You don't even have to use fabric. You can use decorative paper or paper you've made yourself, but I thought fabric looked nicer for this.

-Glue. I used the clear blue Elmer's kids glue and didn't get much of a hold using it so I switched to using a tube of Liquid Sitch and hot glue. Something you should know about Liquid Stitch, no matter what color fabric you use, even black, it's going to show through and give a rough appearance. Not so clean looking. I decided to just use the Liquid Stitch around the edges of the fabric on the inside, which I'll explain later. A good glue stick, like Uhu-Stick can come in handy too, but for a good hold, hot glue works best. 

-Ribbon. You can use twine or any type of ribbon you like. You can even choose to use something else to hold the pages together.

-Hole punch.

-Computer paper or stationary--whatever kind of paper you want to use to make the pages with. I chose clean computer paper.


HOW I DID IT 
 
  So I dug up some adorable, colorful fabric--the flamingos! Unfortunately, I did not have enough to cover both pieces of cardboard so I used some black fabric. You see the pocket I made on the very front of the journal? I actually came up with that idea because my fabric piece didn't quite cover the full front! 

  I took the pocket piece of fabric and hemmed the "L" shape so it wouldn't fray, and so it'd look clean. Then I used Liquid Stitch and some hot glue to hold down the black fabric. Afterwards, I ran an iron over the entire thing to help the glue hold better and to smooth those lumps made from hot glue. See the photo below, with the front "L" shaped pocket.


   After hemming the pocket and gluing down the black piece of fabric, I started on the other piece of flamingo fabric. You see that on the front here, there's three pieces: the L shaped piece, a square piece of the same fabric under the L shaped one and the black. 


  After using hot glue to hold the black piece down, I went ahead and folded a straight line across my square shaped flamingo fabric, that way it would have a clean cut rather than a frayed, non-straight end.  I simply folded the end down and made an easy hem by using hot glue to glue the fold.


  Then I positioned it under right under the black piece and hot glued. After that, I done the same with the L shaped pocket. This is where you need to be careful because you may accidentally glue the pocket down. It won't be a pocket then! You only need to glue the edges of  the pocket onto the other side of the cardboard, if that makes sense? This will leave that piece of fabric opened so that you can use it as a pocket for post its, receipts, pages, ect. 


   Above you see the ugly side of the cardboard where I glued the fabric. I glued the sides onto the other side and left the pocket open, like I mentioned. Later, I made a little change to clean up the inside of the cardboard journal covers.

  The front side of the top cover was finished. I just needed to run the iron over it to flatten out hot glue lumps and ensure a good, sturdy hold. I sat that piece aside and went to work on the back cover.

  There on the back cover I did the same thing, only I didn't make an L shaped pocket. Instead, I done a simple half black, half flamingo and left the inner portion of the flamingo fabric un-glued that way it could be used as a pocket too. I just used the same technique as I did with the L shaped pocket. Only gluing the fabric sides down onto the "ugly" side of the cardboard.

  
  The picture above shows the back cover. The flamingo fabric is the pocket. After all the fabric was glued down and holding on well, I went for the hole punching!


  I started by making holes through each cardboard piece. I skipped my hole punch because it wasn't ideal and used an X-acto blade. I sliced through in three different spots. Rather than having a large hole, the small slices are hardly noticeable.

  Then I grabbed my stack of computer paper, folded them all in half and began punching holes. 


  Then I began threading the ribbon through. Since I went with ribbon and small slices rather than holes, I needed to use a needle to thread the ribbon through. I actually began with a pastel pink twine like material and didn't like it so I switched to black satin ribbon. 


  I threaded one piece of ribbon through the first two holes and then made a bow to hold things in. 


  Then I threaded the other piece of ribbon through the last hole and the middle hole. If you look at the photo, I used the middle hole for both the top and the bottom ribbon. Pictures will do a better job of explaining than I do. 


  I threaded the ribbon through the pages as well. That's the purpose, to hold everything together.


  And almost done, but the inside is left ugly and it will be seen when the book is opened. Since I give my journals as gifts, I wasn't about to leave the inside so ugly when the outside was so pretty.

  A simple piece of folded computer paper will clean the look up drastically. If you really wanted to go all out, you could use fabric here too, assuming you have enough. I didn't and I used computer paper.

  
  In this picture above, you can see what I did to make the edges of the cover-up paper look really nice. I simply folded on piece in half and then folded down each edge, like you do with a fake hem. I then ironed my folds so they'd stay down well. Lastly, I broke out the glue again and went to town!  See how nice that looks, in the picture down there?


  You can't really see it, but I wanted to give my own personal touch by leaving a brief message in the front cover, so I used my pastel pink owl stamp and cut out a tiny piece from a flash card. I know owls are nothing like flamingos, but I never can resist using my Mr. Owl stamp on... EVERYTHING! I put him there and wrote a little "you are awesome" note to the receiver of my journal.


*So, is this something ya'll will be doing? If so, I would love for you to show off your photos to me! I adore the journal projects. I'm always using my funky fabric scraps for these or either one of my storage boxes I often gift. That reminds me, have you guys seen the photos I posted of my storage box gifts? Oh, they're so cute!

Tuesday, March 6, 2012

The pretty much free skirt!


  I'm kind of a beginner at this sewing stuff so to most people, this is an easy skirt to make, but to me, it was one hell of an accomplishment! Since I stick with simple projects for now as I've been teaching myself to sew for the past several months, I won't give you instructions on how to make this... unless you actually did want to know how and I'd love to! However, I am learning absolutely everything on my very own and it can be tough! I went into crafting knowing zero. I simply do what seems possible for me and I have nearly ripped every hair out of my head on some projects, but the ones that do turn out well are so worth it!

  First, no I was NOT picking a wedgie or scratching my booty in that first pic! I was actually adjusting my leggings underneath when my lovie decided to snap the pic. How nice of him? It's the only picture thought that really showed the blue colors so I went with it rather than putting it back on and taking more pics.

  THIS, my darling lovelies, is a Sand Mountain kind of skirt! You know, the ones you make without spending a single penny! Ha. That's right. I made this skirt for nothing. Well, I actually made it to wear because I thought it'd be really funky and cute, but I paid absolutely nothing to make it.

  You may have to pay for fabric if you don't have any on hand that you can use, but you can do this without buying anything else! YES, I'm a Sand Mountain cheapie! LOL.

  A couple of weeks ago A (12 year old) came in with his shorts around his ankles (strangely this is not an uncommon occurance at our house. We're tryin' to break him.) Ha. Ha. Anyways, we made him pull his shorts up. He did and then stuck his hand up the leg of the shorts and I heard ripppping. I asked what on earth was going on inside there and after a minute of tugging and a lot of ripping sounds, from the bottom of his shorts leg, out came this horrendous pair of boxers all torn up! Ha. Ha. He had been wearing them with a rip and then he was playing and ripped them all over.

 While he dangled his boxer shorts proudly in the air with a crap-eating-grin on his face, the genuis idea came to me! I snatched em' right out of his hand and went to work. He said "hey! I was gonna throw those away. They're ripped and you cannot fix them with your sewing machine and make me re-wear em'!" Ha. Ha. I always sew up his jeans when they rip and unfortunately, this too is a very common occurance at our house. I swear, the kid rips his jeans at least once a week! So he thought I was going to fix those underwear up and make him wear them! It was hilarious, but no, my friends. No. I had a much better idea in mind.

What do his underwear have to do with my tie dye skirt? Hee. Hee. HEE. Instead of using the last pack of elastic I had on hand, I grabbed my X-acto knife and cut the elastic band right out of his torn up underwear! We are the same size so I get really lucky on these sort of projects! Or when I've not washed my own clothes in a month and laundry day leaves me with no clothes. 

The tie-dye fabric was actually yards long and my lovely grandmother who has supported my crazy-ass craft journey, donated a box of VERY old fabric she had at her house. The tie-dye, I fell in love with. Which brings me to another sweet story, but I'll cut it short, promise. This same tie-dye fabric is believed (by me) to have been my mother's when she first moved out of my grandmothers home and in with my father! That's what makes this fabric so cool to me. My lovely mom had told me a story about how when she was young she took on sewing too and her first project was tie-dye curtains and well, judging by her story and the huge chunk of fabric my grandmother gave me, this was more than likely my mom's when she was barely 20! That's old for fabric and how neat that it's been handed down and all?

So I measured the length I wanted and nearly doubled the width as I wanted this skirt to be kinda scrunchy. You can see I didn't make it large enough in the waist to get the amount of scrunch there I had wanted, but that's OK. It's better than my first try at the skirt! I had cut it so small that it would fit my waist, but not my rear! Ha. Ha. I decided to use that piece that was too small to make my precious Buggy (my 2 year old neice) a matching skirt! Then Miss Molly who's 7 will have one as well! These ladies will be matching me. Maybe that's lame, but I think it's cute. 

After getting the right size cut, I hemmed the edges and stuck a large safety pin in one end of the elastic I got from A's torn undies. Lol! Oh, oops. I almost forgot. I actually sewed a little pocket (fold the fabric at the waist down so the elastic will have a little pocket) And THEN I put my pin through the underwear elastic and inched it through the "pocket" I sewed and bam! I had myself one cute, somewhat scrunchy skirt! 

After that last paragraph I totally realized that God clearly did not intend for me to write instructions on things. That was all jacked up! Lol. If you did happen to want to try this project and had questions, I promise I'll be able to answer them without leaving things out. Lol.

So, that my friends, is the story of my pretty much free skirt! How nice? It's certainly a story to pass down to our kids! 

Wednesday, March 16, 2011

The lovely J and O fabrics

Hello my darlings,

As I mentioned previously, I had recieved tulle from http://www.jandofabrics.com/ to use for a project I'm working on with some little girls. It's going very well so far. We have a lot of creative ideas for making items for young girls who could use a smile & of course a cute skirt! I will be posting photos of our finished projects when they're completed! I did want to say what beautiful tulle J and O Fabrics offers. They aren't like most of the tulles I've seen, They hold up well & are high quality. So for all my lovely crafters out there I hope yall will check them out.

 http://www.jandofarbics.com/ They also have amazing customer service! So kind and helpful.

Thursday, March 10, 2011

I've got a great fabric store to share with you: http://www.jandofabrics.com/

Hay my precious sparklies, I have a wonderful site to share with you my sewing ladies out there are going to love this one...

 http://www.jandofabrics.com/ I just recently was told about the site so I visited them myself. I really love the wide variety of fabric they offer and the customer service department are so kind & they get back to you quickly, always a plus.

 I found some beautiful fabric on their site. I had to pull out my notepad and make a 'purchase list.' & to think I almost wasted my money on the plain, small variety at wal-mart! I'm so glad that I visited J & O fabrics before doing that. I just thought I'd share the link with you lovelies. I hope you take a minute & stop by!

 We have a little project going on right now & I'll be using J & O fabric. I'll be sure to post pics of the finished pieces! Now, while you're waiting for those photos you can go check out their online store: http://www.jandofabrics.com/

 I'd love to know the ideas for projects you ladies (or men) come up with after visiting their site!