Translate

Showing posts with label DIY Projects. Show all posts

Wednesday, October 23, 2013

DIY No-Sew Panties into Bandeau!

 From this:        A pair of lace, stretchy panties
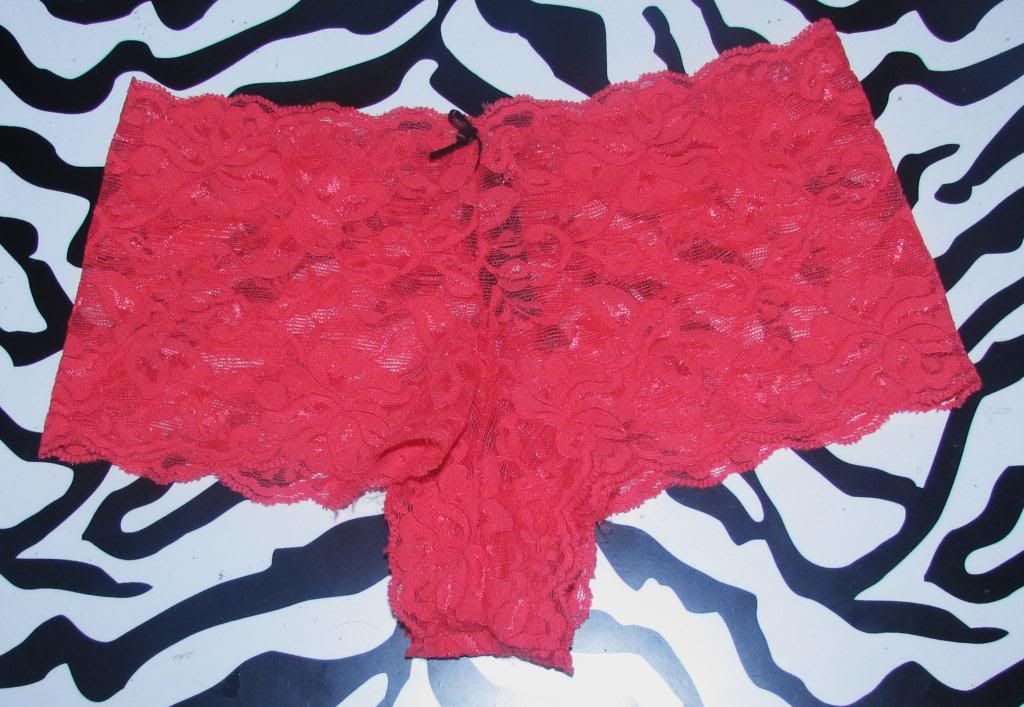


To This! A quick Lacy Bandeau to wear under tops


If you're like me, a collection of under garments is your BFF. I also like to have several bandeau style tops on-hand for tops that are too low or for when I don't want to wear a bra or the blouse/dress I'm wearing doesn't allow a bra to be worn without it showing. 

I have made my own easy, quickly-put-together bandeaus for a long time. You might be surprised to learn that the cost of making one far, far less than those you see for $5+ in stores. Seriously. It costs around $1 to make one. However, if you wanted to add a lining to keep your bandeau from being transparent (see-through), then the cost will be slightly more.

The good news is, if you aren't a perfectionist and you already have some scrap material (stretchy lacy undies, fabric that you can use as a lining, etc.) on-hand, then the chances of your new bandeau costing you no money is high! Mine actually costed me nothing to make, especially since the undies were given to me as a gift. 

The lacy underwear I used were stretchy boy-short style, which I found very uncomfortable as underwear, by the way.  A pair of these stretchy, lace boy-shorts are available at Wal-Mart and other stores for really cheap, and they come in all sorts of pretty colors. I have one in turquoise that made a gorgeous bandeau!

So, I'm going to show you how I did this. Take note! I am not a perfectionist, and it shows. If you are, you can make the necessary adjustments as you wish. 

Again, since these boy-shorts were stretchy lace, I didn't need to do any sewing. The method of turning them into a bandeau actually only requires cutting out the crotch! Unless of course you want to add to it by putting in a lining or something.

How I Do It
I laid them out, and cut the crotch straight across, completely off. I didn't bother trying to make it perfect. I kept the black bow that was on the top front of the undies, and wear the bandeau with the little bow in the front. You can easily cut panty-bows off, if you don't want them.

I'm not sure this would've worked so easily if I were not working with a boy-short style because other panties like briefs do not really have the squared shape. Also, these boyshorts (like most) have the crotch somewhat hanging, if that makes sense. Look at my photo of the undies to better understand what I mean -- the crotch comes down lower than the rest of the panties. This makes it easy to just cut the crotch straight across and be left with pretty much a straight edged square.
 
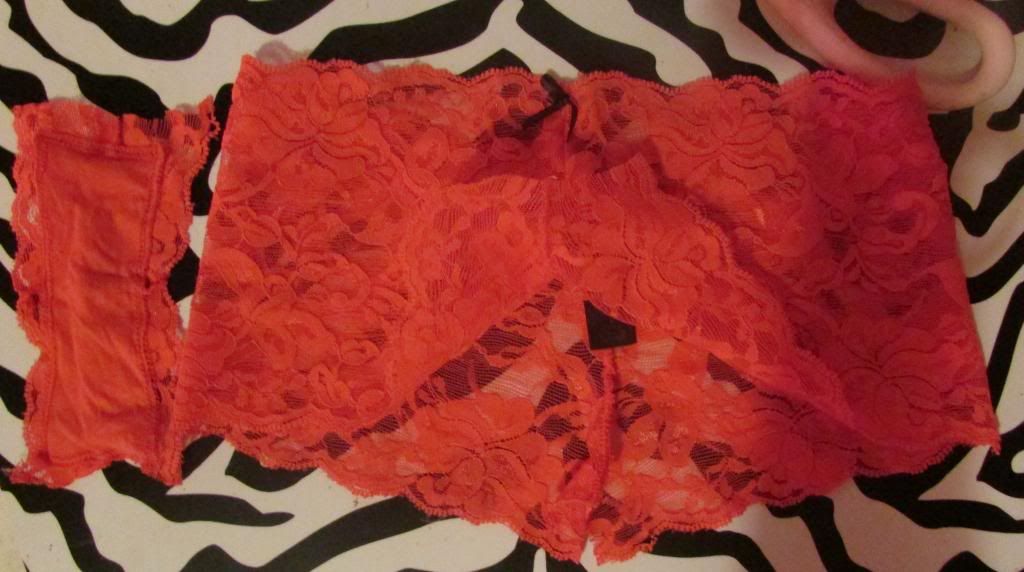
See how the crotch area "hangs" down further than the edges of the panties? Cut straight across, clipping the crotch right off. Then, you'll be left with this:


Crotch is cut out (the crotch fabric is seen on the left) and basically, it's just a rectangle of lace left.


You'll notice it isn't totally a straight-edged square as the crotch area leaves a little fold over area where it was cut out. Since this part of the bandeau will be under my shirts and not show (and really isn't noticeable in the first place), I chose not to add any stitching or anything to make it perfect. Like I said, if you are a perfectionist, a few stitches would fix this part right up.

*Forgive my less than perfect quality photos. The lighting was funny and my camera just wasn't cooperating with me well. I added another photo below (with a bit better lighting) in hopes of it showing the panties after cutting them better. The panties are actually a bold orange-like color, but they look red.


Of course I kept the little crotch strip because small lace left-overs always come in handy for patching up holes in jeans and shirts, too!

Lining -- Optional
I did not add any extra lining to my bandeau. Since it was a quick project just to wear underneath several tops and dresses, I really didn't feel the need to go all out and add a lining under the lace. But keep in mind, it is see-through without lining! You can use a matching or contrasting fabric to really spruce it up, if you plan on showing more of the bandeau off than I do. 

Another trick I've been using successfully for years is those little swimsuit top cups that you find in most swimsuit tops (the thin "pad" cups) -- I place those inside my bandeaus for a little more nipple coverage, so that those suckers don't show right through my shirts so much. 

*Look at the bottom -- you can see imperfection I mentioned from the crotch-cutting. It doesn't bother me since it doesn't show under my shirts. You can sew it up there, though.*

It's really helpul, and in some of my dresses that don't allow a bra, I've sewed the "cups" in! Built-in bra! You can use that method if you want more coverage in a bandeau.

I only took a photo of the back of the bandeau while on. There was just no way to show you guys a photo of the front without risking being too... bare. Sorry! Just can't get that personal with you. ;) I hope this was helpful for someone though. If you are like me and have a pile of boyshorts that are unflattering or uncomfortable, you should have a fun time using them to add another piece of underwear to your wardrobe.

I wear these home-made bandeaus with a lot of different tops, mostly tank tops that are very low cut. Most of us do not wear bras with such showy tops because it just doesn't look that great on some of us (just not flattering when bra pokes out in every direction, and it really takes away from a cute top). The good thing about a thin, lacy bandeau is I don't mind it peeking under the arm-pits of my tank tops, the back and the front area. It adds color, is subtle, looks cute and is still classy.

P.S. if you simply don't want to fork over a $5-$8 and up bandeau bra but you don't have any lace or un-wearable lace boyshorts to make your bandeau, I encourage you to still opt for a DIY version! I've bought a yard of lace for less than $2 at Wal-Mart, so even if you do have to buy your materials to DIY a bandeau, you're going to come out cheaper than if you bought a bandeau. Plus, if you go out and buy a yard of $1-$2 lace, you'll have so much left over that you could make dozens of these bandeaus or even use the remaining lace for another nifty project. 

Which brings me to this: you can never have too much lace. Funny, I have always said that about lingerie too! But it's true. You can never have enough of either. Lace will always, always come in handy and it's always in style. You would truly be amazed at what all items in your wardrobe you can finally begin to wear again just by adding a little lace. Shirt too short? Add a lacy bottom layer. Works for short skirts/ dresses too and spices them up! Holes in your jeans? Patch with lace.  Shirt too tight? Cut it down the middle in the back, add lace. Bam! It's a life-saver.

I hope you guys enjoyed this DIY post. I'm a cheapie and hate tossing clothes because I almost always manage to find a way to make them look nice again. So I like to share these little things with ya'll in hopes of helping other fellow bargainers like myself to get the most of the wardrobe they have. 

It really makes a huge difference just adding a little something to one or two old tops. So, what items do you guys throw together to pull off a look? Do you guys DIY bandeau? Do you know any other nifty uses for old, un-wearable underwear? I would love to hear from you! Leave me your suggestions, tips, thoughts and anything else in the comments section.


Monday, October 7, 2013

Wire wrapped Ring & bracelet


I started experimenting with wire jewelry over the last year using all sorts of different gauges, colors and techniques for incorporating some wire pieces into my hand-made jewelry. 

I love the look, but I don't have as much patience with wire wrapping like I do with other things (like knitting!) 

So, my wire-work is far from perfect. It takes serious practice and skill to do a lot of the wire detailing techniques. Some of the blogs I follow have some serious talent with wire, but I don't. I'm clumsy with it and again, impatient. 

However, I enjoy working with wire and the appearance of it in my jewelry, so I just continue working with it, even if it means my pieces will be imperfect.

 Last night, I decided it was high time I finally put this gorgeous single green and blue glass bead I had to use. 

I love this one bead, but had no other like it or anything that really matched. I have stared at it and racked my brain forever trying to come up with a way to use it in jewelry, but I always ended up tossing my ideas because the single little bead is so pretty that adding it to a necklace or bracelet full of other beads felt like it'd take away from this beauty. 

So what better way to display it than on a ring?

I used this newer, easier to manipulate wire that I had on hand and what do ya know?

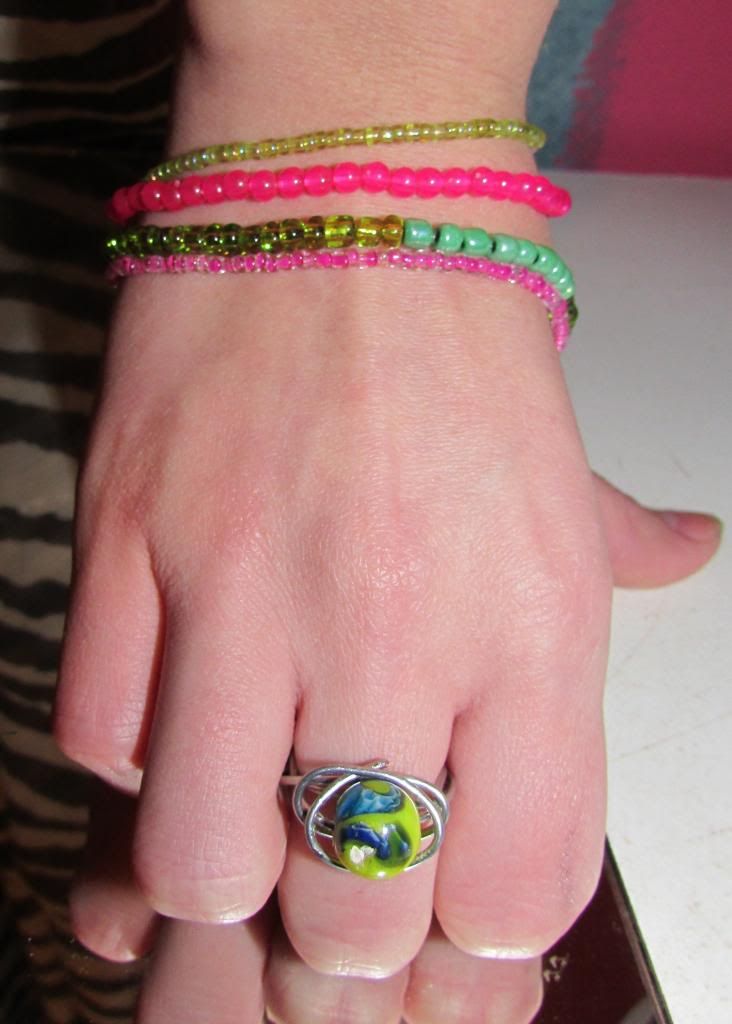
 Less than 15 minutes later, I had me this lovely little ring! I don't know if you guys (or anyone else on the planet, for that matter) find it very appealing, but I just love it! It's simple and although very imperfect, I really love the outcome. 

So, for those of you like me who get frustrated with wire working, and are impatient but desperately want to work with wire -- this is the perfect project to work with. It's also great for those who have yet to gain skills with wire (like me!) because it's so easy to make it look nice. Plus, it's so fun to experiment with the different wrapping techniques and beads you can add on. 

It's a quick project, too.


 I wasn't kidding when I said it's imperfect. The wire isn't straight or even aroun the ring, but I ended up liking it like that, so I quit trying to make it perfect. It kind of looks to me like a globe. It's really modern, funky and statement-piecy.

There is also a chip in the bead, which blows, but it came that way and I wasn't going to let a little chip prevent me from getting use out of something so pretty.

In fact, I'm so happy with the outcome (and the ease of using the new wire! The wire I'd been using was so much harder to manipulate) that I plan to use my whole section of single beads with nothing to match for wire rings!


For the ring, I basically just followed the instructions to this tutorial on Craftsy by Kimberlie for the band, the part that goes around your finger. 

I then just went with it instead of doing mine exactly as the one shown in that tutorial. Kimberlie's tutorial is really great, though for someone who likes to follow instructions, and a beginner could easily rock the project with her detailed instructions.

I can't tell you what gauge of wire mine is because it came from the inside of scrap wires B had collected (for taking to the scrap place for cash). By the way, this is one fabulous way to get up a collection of wire! 

If you or someone you know saves scrap wires (like wires that come from old appliances that don't work any longer) to exchange for cash, then sometimes you'll have some left that won't bring much money, but can be put to beautiful use with jewelry! I'm actually really grateful for his hobby of stripping wire for extra money because it has saved me from having to buy a lot of jewelry wire. You just need to make sure you clean it if it's dirty.

However, the tutorial I linked to recommends 22 gauge wire, which is easy to work with. I'm pretty sure mine was very close to that gauging.  If you have a gauge close to that, then as long as it's easy to manipulate, you can use it instead.

The only other supplies you'll need is the bead(s) you plan to put on the ring and some pliers. Making wire rings usually calls for having a mandrel (a tool that allows you to wrap the wire around for the correct ring size), but like I said, I'm impatient and I just go with what I have. I simply used my finger as a guide. 

You can also use something that's the same size as your finger for wrapping, too. 

Once I wrapped the wire around my finger twice I strung the bead on, and simply used the tails of both sides of my wire to make the shape around the bead. I just kept wrapping it around, and then tucked the end of the wire down. You can make it look nicer if you are patient enough to work the ends of the wires into the ring well (which you'll learn about in the tutorial I linked to,) but I didn't bother with that.


The Bracelet

As for the bracelet that's also shown in the photos here, I made it as a quick project last night, too. Most of you will already know how to make something this simple, but here's the details just in case...

I had been wanting to use these seed beads, but didn't have a whole bunch to make a thick, chunky, colorful seed necklace, so I made a bracelet. It's very easy and quick, and requires very little supplies or $ if you already have string, seed beads and a clasp of some sort on hand. If you don't have a clasp, you can use stretchy string, which makes the project even easier!

If you're in a hurry, and don't care to make every detail perfect, I'd recommend just working with stretchy string to easily slip the bracelet on. Plus, it won't require any clasps.

 I used a jump ring, 2 crimp beads and a lobster clasp that I just hook onto one strand of beads on the opposite side of the clasp (when it's on my arm.) No, this isn't the most proper way to go, but like I said, I can be lazy about using my good findings when I'm making jewelry that's for me and not to give away or sell.

As you can see, I used a variety of colors and sizes of seed beads. I coordinated two different greens and pinks. On the green strand, as I neared the middle of the bracelet strand, I added 12 of the opposite color (pink,) and did the same for the other just to give them a more modern look.

I use fishing wire for most of my beading projects, including this one. I simply strung each strand (after measuring it to fit my wrist and allowing 2 inches for knots for the ends and clasp).

I repeated that process until I had used all my seed beads (which gave me a nice 4 strands.) Then, I used a crimp bead (to hold them together and secure the ends so the beads don't slip off if your knot falls loose) to hold all strands together at both ends, making one bracelet out of the 4 strands.

And, obviously, I placed a jump ring on one end of the strung-together strands, and for the other end, I just hooked on a lobster clasp for simply, quick clasping! 

To fasten it, all I do is clasp the lobster clasp onto the other side's jump ring, or to make it tighter on my wrist, I'll attach the lobster clasp to one of the strands of beads. Either way works.

Now, tell me all about your own projects! What are you guys working on at the moment? Have any interesting favorites to make? Do you guys love the wire rings, too? 

P.S. I've also taken up knitting the last several months and oh am I in love! I know some of you guys are knitters, too, so feel free to send me tips and advice for newbies! I desperately need knitter-friends! Nobody I know knits (except a couple online friends), so I find myself desperate for crafty conversation. 

Love to hear from you guys!